Showing posts with label Rally. Show all posts

Saturday, 25 May 2013

Service and maintenance prior to Classic Scooter Run to Oslo in June, part 1

Classic Scooter Run is in Oslo this year, and it's probably time to get the Rally in tip top shape. Lately, I've had to choke the motor in order to get it to run properly; probably a good idea to clean out the carburettor.
 
Another issue is the damaged damper rubber in the front, parts have been ordered.  

 In need of a wash after the winter...

The spare wheel cover fell of during a rideout, new one ordered...
 
 The Rally cowls are in amazingly good state, only some minor surface rust some places on the inside. Degrease and wash.
 
And into the garage we go...
 
The front drum and brakes were dismantled for brake service, and at the same time access to the damaged damper rubber in the back.

Am a bit reluctant; I have a new damper available for the Rally, but an uncertain about changing at this stage.

Closeup; Rubber totally skewed.


Rearend got the same treatment; full break service.
 
The brake drums have seen better days...
 
So I decided to degrease and glass blast them as I did on my 180SS

Glass blasted drums with a layer of primer, will get some coats of silver and clear before I'm finished.
 
The carburettor was dismantled into atoms and run through the Ultrasonic Cleaner.


Tuesday, 14 February 2012

Saddle fix

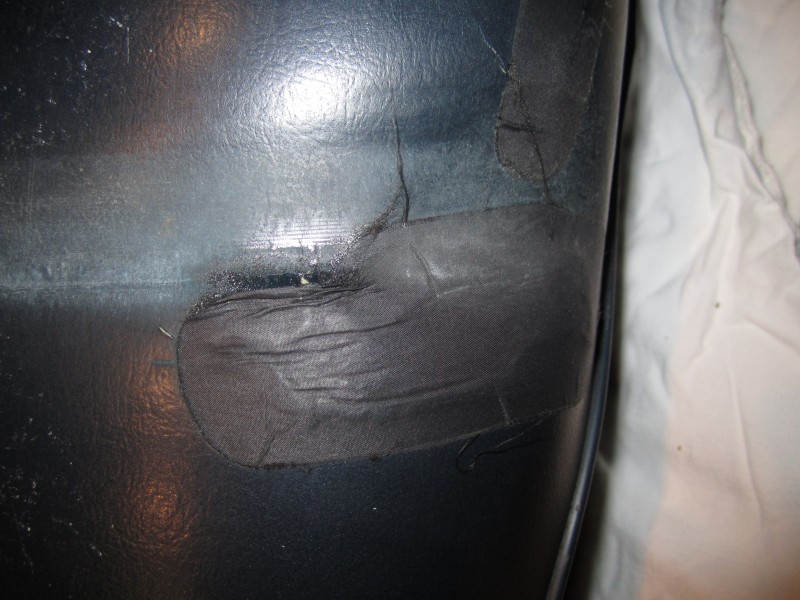
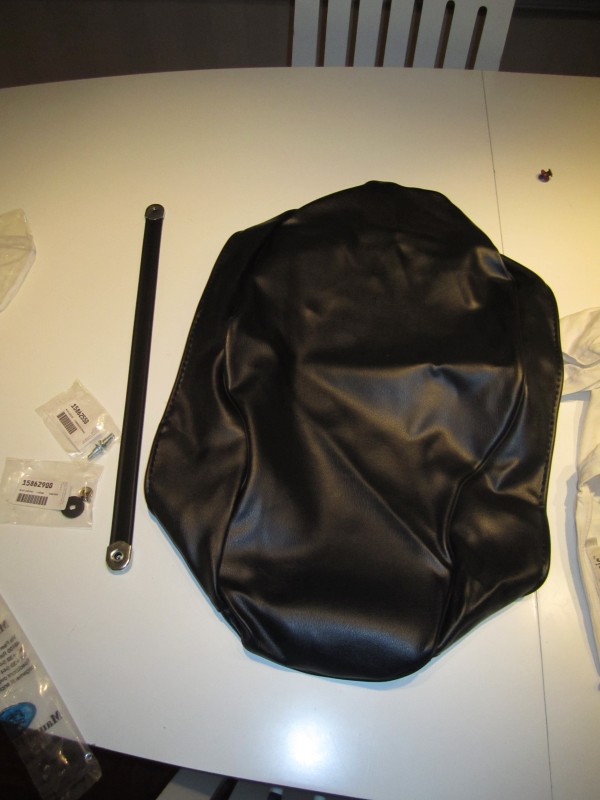
Time for a saddle overhaul. The original saddle on the Rally is in exceptionally good condition for its age, but has started to crack up. I've fixed it several places with black tape, but new cracks emerge, so it was about time to fix. Mauro Pascoli saddle cover, strap, "button" on back, and new screws to attach the strap was procured from SIP several months ago, just been waiting for the right moment to do the job.

The saddle looks ok...

closer inspection reveals tape repairs...

and some problems with the seams.

New cover, pretty similar to old. Softer though.

The inside reveals practically no rust, no restauration of the saddle chassis necessary.

Time to peal off. Strap unscrewed and fixing clamps removed from inside.

Tear off from back...

Revealing the foam in good condition...

 Some minor damage on the sides, but nothing to worry about.

 Back is complete.

 New "button" attached.

 "Button" on inside.

Navigate the new cover into place, and secure with clamps.

Use some time to get the cover symmetrical and even.

Attach the saddle strap...


 and voila.

Saddle as good as new, and it didn't even take me a full hour.

Monday, 2 May 2011

Painting tank


Todays work: Spraypainted the new tank and some other small details. Lacking a proper place to spray paint, the work was done outside. The spray paint nozzle provided with the paint produced a very wide spray conus compared to an ordinary spray can.  Except for that the spray was easily distributed, and the result looks OK. Some dust was to be expected when spraying outside.

Small parts also sprayed.


Also took the opportunity to paint over some bruises on the Rally itself with a pencil.  The color I chose is very close to the original color, but not 100%. Will have to check again when it has dried up, and in broad daylight. 

Now I just hope the tank will be dry and hardened enough before tomorrow night, so that I can install it before the Approval on Wednesday. 

Monday, 4 April 2011

Speedo fix

New package from SIP arrived today. The long awaited speedometer for the Rally was here.

First off: Speedometer light. The bulb holder didn't come with the new speedo, so the old one was utilized. The cable had to be soldiered, the previous owner had disabled the light. 

The new Piaggio (or rather Veglia Borletti) OEM part looks right from top, but that is only skin deep. I must say I was discontent with the unit; The chrome ring around the speedometer is missing. The housing of the unit is made of plastic. The holes are not threaded, this has to be done manually. Last but not least, The bulb holder is not part of the package. Not impressed. 

I skipped changing the speedometer wire, but fixed the speedo setup on the front wheel. After some investigation, I found out that a part compressing the wire into place was missing. Fixed with new parts.

The old stands were replaced with new ones. 

The spare wheel was beyond washing, so it was treated with a full sand blast & etch primer job. Silver paint remains. 

So now the speedo works! The electrical setup however is faulty still, so no lights in the speedo yet. 

Thursday, 31 March 2011

Some bodywork...

Did some minor body work today on the Rally.

The front fender has a dent on top...

And both sidecowls had some minor dents that easily could be fixed.

Of course; standard on all Vespas, the ventilation grill has been bent.  

A hammer, some counterweights and patience does the trick.

And voila! Ventilation grill is OK and the dent on the upper part of the cowl has been removed.

Same with left side. Notice this part is shining a bit more. The cowling was treated with a paint renovator, and it shines. Oh yes. Very pleased with the result!

Latest addition today was test fitting of a new spare tire cover. This part was missing from the bike when it was bought, new plastic part ordered from SIP.

The Rally is soon ready for approval & registration, will probably change tires just to be on the safe side, both for approval reasons as well as for safety when riding to Vespa World Days in Gjøvik (Approx 600kms from here).

Things on the todo list before registration:
  • Fix electric bug; Horn only works when lights are off.
  • Install new speedometer.
  • Install new tank, which also needs a coat of paint.
  • Acquire matching paint.
  • Fix handlebars to non-turnsignal.
On Monday I will hopefully get a better date for registration than 10th of May. In addition to being awckwardly close to riding to Gjøvik, I'm also on vacation on Cyprus... I might have to go to Egersund (1 hour drive) for earlier appointment.

Sunday, 27 March 2011

Degreasing

Finally some weather in Stavanger that allows for some outside activities; The Rally and Regine were both degreased and washed. And both needed it. 

A bit worried that the degreasing and water would make the Vespas hard to start again afterwards, but I was proven wrong. 

Stunningly good appearance for a 1975 model Rally!

Front...

and rear. 


Tuesday, 8 March 2011

Initial startup

Back in Stavanger, I've enjoyed a first date with the new lady. She fires up willingly, and with some adjustments the engine feels very quick and responsive. Some WD40 loosened up the handlebars, and although my 180SS is pretty similar, this scooter feels much more "german" in its handling; Tight and firm. The brakes just need some minor adjustments.

On the other side, I have noticed some incontinence, she leaves oil stains. 

The Cuppini bars have been removed together with the bolt on mirrors, and the horrible turn signals.

The suspect tank is infact very suspect; for some reason it seems like the original top of the tank has been welded to the bottom of another tank, uncertain why. 

And the reason why the tank valve didn't respond as supposed (providing reserve, close, open) is quite obvious when lifting the tank; a household valve has been used to repair the tank valve. This will have to be fixed, new tank needs to be sourced.

The battery is infact working, but I will most likely change it due to age, just to be on the certain side. On the electric side, the turnsignals didn't work, but most of the other lights seems to work, but rather poorly. The horn was non-responsive, but this could be due to lack of power on battery?

The Femsatronic 200 Rally engine, as you can observe there is quite some oil spill from the engine, further investigations will have to be made. I changed the oil  and installed new seals on both oil screws, but a fair amount of oil was on the floor the next day. 

I might need to split the engine earlier than I thought...