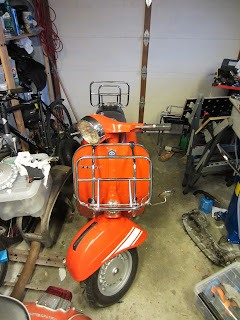
Thursday 29 August 2013

Speedo fix

The rally to Vestlandsrun 2013 - Sokndal went beautifully, and the Rally behaved extremely well. On the way home however, the speedo stopped working.

Speedo dismantled as no obvious external damage was found. When the speedo was taken out, the wire pulled up and a break was found. 

New cable inserted into sleeve...

 The speedo drive gear was inspected and found ok, added new grease...

Drive gear grease nipple was cleaned and put back in place.

A new rubber on the rear brake was also installed, using "Dream Hairspray" for a sticky touch. 

And the Rally is back on track!

Thursday 15 August 2013

Chokehandle fix


Yesterday the choke started acting funny. Just my luck, two days from Vestlandsrun 2013.

Choke handle was completely loose. 


 Inspection after removing seat and fuel tank revealed this defect. Tack welds said "thank you" after 37 years of service.

As new tack welds or other welding was out of the question, I turned to glue. The area to be glued is quite big, so I would give it a go. Casco Strong Epoxy Metal was selected for the task.

 Initial sanding and cleaning...

Glued and mounted part.

Hopefully the epoxy will do the trick.

Sunday 9 June 2013

Final preparation before going to Classic Scooterrun 15 in Oslo

Not a minute too late; a backorder from SIP turned up the day before CSR15. In the package was a set of Cuppini luggage carriers, both for the front and back. They were immediately installed on the Rally.

 Parts in the box. At this point everything seems ok.

Installed, but not just plug and play. 

The parts didn't fit together as I'd expected, the lower "hooks" to hold the front carrier were not wide enough for holding around the legshield chrome beed, and I had to modify the hooks to get the carrier fixated. This process broke one of the fixing rods, but I managed to salvage it somewhat. I had to modify some of the nuts and bolts that came with the set to get it installed, and I found it weird that the lower fixations were of metal only. But: Short on time, I had to get it to work. 

I learned a day later, at the Classic Scooterrun 15 that there should have been two rubberized clamps included in the set, which connects to the "z" fixing rods! I will have to send SIP a complaint on this. The carrier is fine, but all the nuts & bolts and small items will be required for a proper install. 


Anyways: Content with the look and not at least the functionality! 
Ready for Classic Scooterrun 15 in Oslo!


Wednesday 29 May 2013

Service and maintenance prior to Classic Scooter Run Oslo, part 2


 Drums were finally dry after a couple of coats of silver and a couple of coats of clear. 

New Newfren braking pads were installed in the front...

The original damper was inspected, and the lower rubber and insert was replaced.

 Damper installed again...

 And front wheel in place.

At some point the fork should get the same treatment, but this will not happen this year. 
 
 New brakepads was also installed in the rear. 

Opted to assemble drum and rim in one go to minimize risk of damage to the newly painted part.

 I've had a period typical license plate lying around for the Rally for ages, and I finally got around to mount this as well. 
 
Older, more correct vintage look. 

The silver brake drums really stand out!

 Spare wheel assembled as well. I added locktite to the nut, as the last spare wheel cover went A.W.O.L. 

Apart from that; a quick oil change and a carburettor adjustment was performed. Test drive will have to wait until tomorrow. 


Saturday 25 May 2013

Service and maintenance prior to Classic Scooter Run to Oslo in June, part 1

Classic Scooter Run is in Oslo this year, and it's probably time to get the Rally in tip top shape. Lately, I've had to choke the motor in order to get it to run properly; probably a good idea to clean out the carburettor.
 
Another issue is the damaged damper rubber in the front, parts have been ordered.  

 In need of a wash after the winter...

The spare wheel cover fell of during a rideout, new one ordered...
 
 The Rally cowls are in amazingly good state, only some minor surface rust some places on the inside. Degrease and wash.
 
And into the garage we go...
 
The front drum and brakes were dismantled for brake service, and at the same time access to the damaged damper rubber in the back.

Am a bit reluctant; I have a new damper available for the Rally, but an uncertain about changing at this stage.

Closeup; Rubber totally skewed.


Rearend got the same treatment; full break service.
 
The brake drums have seen better days...
 
So I decided to degrease and glass blast them as I did on my 180SS

Glass blasted drums with a layer of primer, will get some coats of silver and clear before I'm finished.
 
The carburettor was dismantled into atoms and run through the Ultrasonic Cleaner.


Tuesday 14 February 2012

Saddle fix

Time for a saddle overhaul. The original saddle on the Rally is in exceptionally good condition for its age, but has started to crack up. I've fixed it several places with black tape, but new cracks emerge, so it was about time to fix. Mauro Pascoli saddle cover, strap, "button" on back, and new screws to attach the strap was procured from SIP several months ago, just been waiting for the right moment to do the job.

The saddle looks ok...

closer inspection reveals tape repairs...

and some problems with the seams.

New cover, pretty similar to old. Softer though.

The inside reveals practically no rust, no restauration of the saddle chassis necessary.

Time to peal off. Strap unscrewed and fixing clamps removed from inside.

Tear off from back...

Revealing the foam in good condition...

 Some minor damage on the sides, but nothing to worry about.

 Back is complete.

 New "button" attached.

 "Button" on inside.

Navigate the new cover into place, and secure with clamps.

Use some time to get the cover symmetrical and even.

Attach the saddle strap...


 and voila.

Saddle as good as new, and it didn't even take me a full hour.